On this page
- What Is Roof Flashing, and Why Do Roofs Leak at the Joints?
- Stop 1: The Vent Pipe, Where the Rubber Gives Out First
- Stop 2: The Chimney, Where the Code Asks for Two Layers
- Stop 3: How Long Should Step Flashing Be on a Sidewall?
- What to Ask About the Steps on Your Own Wall
- Stop 4: The Valley, the Busiest Water on the Roof
- Stop 5: The Kick-Out, the Piece the Code Never Names
- Stop 6: The Drip Edge, the Last Joint Before the Eavestrough
- What Does Roof Flashing Repair Cost in Ontario?
- Can Flashing Be Repaired, or Does It Need Replacing?
- Six Questions to Put to Anyone Who Flashes Your Roof
- Frequently asked questions
- Reader reviews
Key takeaways
- Roof flashing is mandatory wherever a roof meets a wall that rises above it, under Article 9.26.4.1 of the National Building Code 2020, the code Ontario's 2024 Building Code adopts.
- Step flashing has to lap the piece below by at least 75 mm, so each piece must measure the shingle exposure plus 75 mm. On a 5 5/8 inch exposure that is 218 mm, and a common 8 inch piece falls 15 mm short.
- At a chimney the Code wants two layers: step flashing on the roof and counter flashing embedded at least 25 mm into the masonry, lapping it by 100 mm. A bead of caulk along the brick is not counter flashing.
- A chimney more than 750 mm wide on its uphill side needs a saddle, or a taller flashing in its place, and an open valley needs sheet metal at least 600 mm wide.
- A minor flashing reseal or a new vent boot runs about $150 to $600 in Ontario, most flashing installations $500 to $2,000, and a chimney flashing left through a winter can pass $3,000.
Roof leaks in Ontario rarely start in the open field of the shingles. They start where the shingles stop: at a chimney, a wall, a vent pipe or a valley, the places where roof flashing has to carry water around something a shingle cannot cover. A brown ring on the ceiling beside the chimney after a February thaw is the classic sign.
This guide follows one raindrop down a typical Ontario two-storey, from the vent pipe near the ridge to the eavestrough, and stops at each of the six joints it crosses. At every stop you get the Building Code's actual numbers, what a failure looks like from the driveway, and what fixing it costs. We fabricate custom flashing on site in aluminum and galvanized steel, and five of the six joints below are ones our custom flashing service covers.
One finding runs through the whole route and it is easy to check on your own house: the Code's step flashing rule is stricter than the sizing generic instructions give, and the common 8 inch piece comes up short on a modern laminated shingle.
What Is Roof Flashing, and Why Do Roofs Leak at the Joints?
Roof flashing is the formed metal that carries water around the places shingles cannot cover: chimneys, walls, vent pipes, valleys and the roof edge. Shingles only shed water while it runs down an unbroken slope. Wherever that slope meets something, flashing has to catch the water and turn it back onto the shingles below.
That is why the National Building Code 2020, which Ontario's 2024 Building Code adopts, makes flashing mandatory at every junction between a roof and a wall that rises above it (Article 9.26.4.1), and sets a minimum thickness for the metal (Article 9.26.4.2):
| Flashing metal | Code minimum thickness |
|---|---|
| Galvanized steel | 0.33 mm |
| Copper | 0.33 mm |
| Zinc | 0.35 mm |
| Aluminum | 0.48 mm |
| Sheet lead | 1.73 mm |
We form ours from aluminum and galvanized steel. Aluminum carries the thickest minimum of the two, and IKO's flashing guidance adds that aluminum must be coated where it touches concrete or masonry, which matters at every chimney and brick wall on the route below.
Here are the six joints one raindrop crosses on its way down, in order, with the Code rule for each and the sign you can spot from the ground:
| Stop | Joint | Code rule | What a failure looks like |
|---|---|---|---|
| 1 | Vent pipe | Manufacturer instructions | A cracked collar around the pipe, a stain on the ceiling below it |
| 2 | Chimney | Articles 9.26.4.4 and 9.26.4.8 | Caulk smeared along the brick, a stain beside the chimney |
| 3 | Sidewall | Articles 9.26.4.4 and 9.26.4.5 | Stains on the wall or ceiling where a roof meets a wall |
| 4 | Valley | Article 9.26.4.3 | Debris dams and washed-out granules down the valley |
| 5 | Kick-out | Not named in the Code | Stained or soft siding below a roof edge that meets a wall |
| 6 | Drip edge | Eave protection, Article 9.26.5.1 | Dark, wet fascia behind the eavestrough |
Stop 1: The Vent Pipe, Where the Rubber Gives Out First
The first thing a raindrop near the ridge meets is a plumbing stack or an exhaust vent, which punches straight through the deck. Its flashing is a collar rather than a joint. IKO's instructions keep it simple: the flashing should be just wider than the vent's diameter, the shingles run up to the bottom of the stack, and nails are used sparingly and kept away from the pipe.
The part to watch is the rubber boot that seals to the pipe: once it cracks, water follows the pipe straight into the attic insulation. On our numbers a cracked boot costs about $200 to replace before it leaks and about $1,200 once it has soaked the deck through a winter, the gap our roof maintenance checklist prices out job by job. The Stouffville roof we replaced in 2026 had a row of stacks and vents, and every one of them had to be flashed on its own.
Stop 2: The Chimney, Where the Code Asks for Two Layers
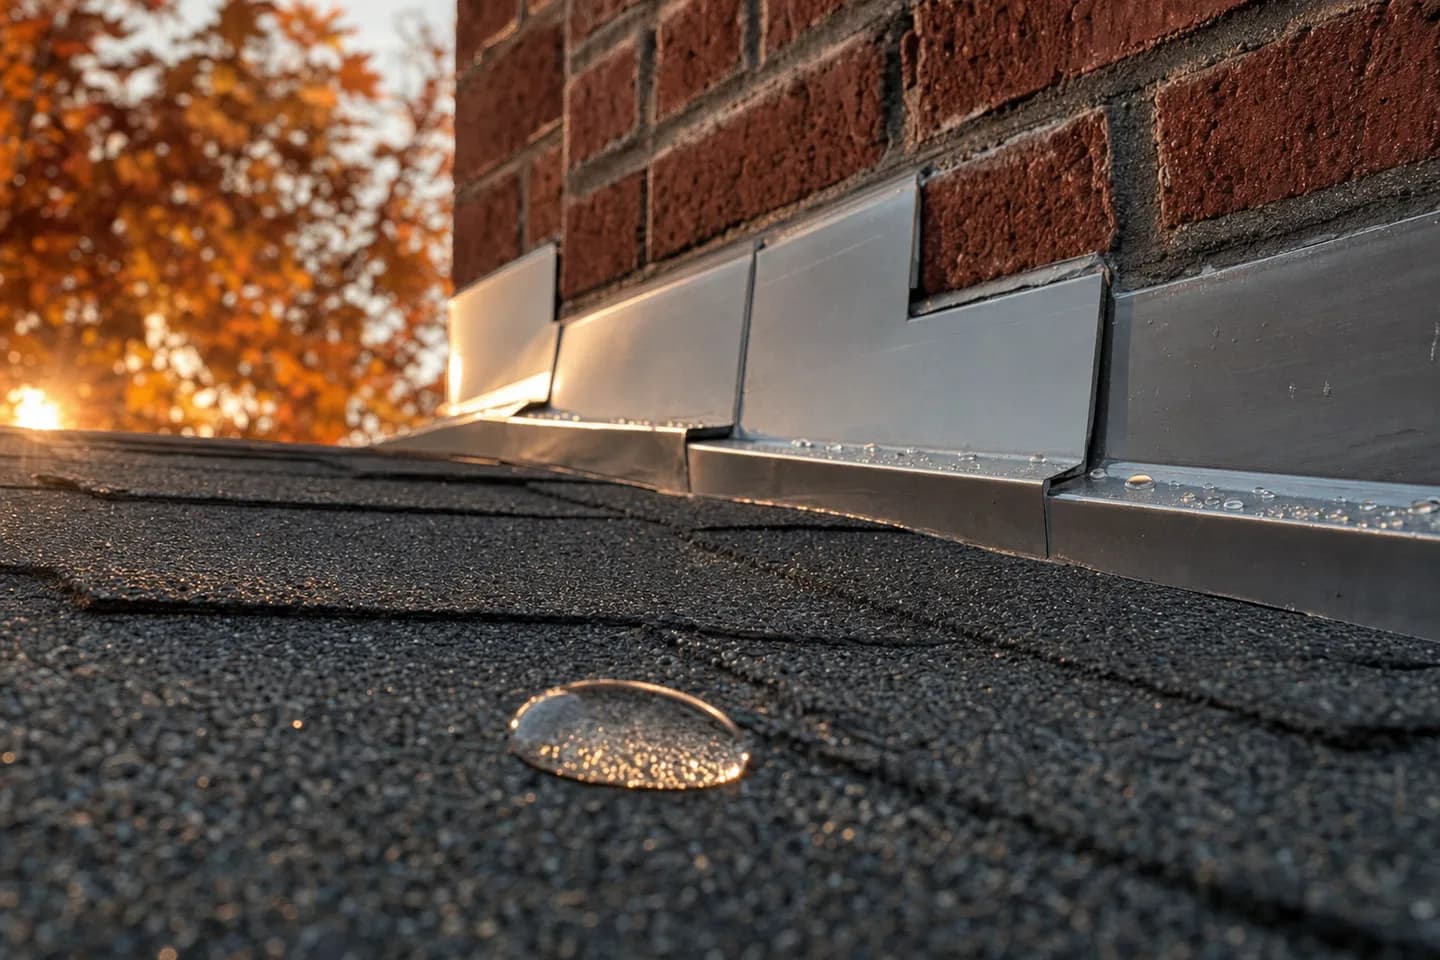
At a chimney the Code requires two layers of metal. Step flashing runs under each shingle course up the sides, and counter flashing, embedded at least 25 mm into the masonry and reaching at least 150 mm down it, laps over the step flashing by 100 mm or more so water never reaches its top edge.
Those numbers come from Article 9.26.4.4, which also asks for a 75 mm head lap in both layers. Where the roof slopes up from the chimney, the flashing has to climb the slope to the same height as the flashing on the brick, and never less than 1.5 times the shingle exposure: about 214 mm on a 5 5/8 inch exposure.
The uphill side of a wide chimney catches a sheet of water with nowhere to go. Article 9.26.4.8 requires a saddle, the small peaked roof behind the chimney that splits that water, wherever the chimney's upper side is more than 750 mm wide. The one alternative is sheet metal flashing that runs up the chimney at least one sixth of its width, and never less than 150 mm, counterflashed like the rest.
Caulk is not counter flashing. Sealant ages, and the joint it bridges keeps moving: IKO's own instruction is to nail step flashing to the deck only, never to the wall, so the roof and the masonry can move independently. A metal leg let into a mortar joint keeps working through that movement. A bead of caulk across the top of the step flashing gives way.
Chimney flashing is also the clearest case for fixing early. On our numbers it is about a $400 repair before it leaks, and once water has spent a winter in the wall it can run past $3,000. If the stain is already on the ceiling, our roof leak repair guide walks through tracing it back to the joint.
Stop 3: How Long Should Step Flashing Be on a Sidewall?
In Ontario each step flashing piece has to measure the shingle exposure plus at least 75 mm up the slope, because the Code requires every step to lap the one below by 75 mm. On a shingle with a 5 5/8 inch (143 mm) exposure, that means a piece at least 218 mm long, about 8.6 inches.
Article 9.26.4.5 covers a shingle roof meeting a wall clad in anything other than masonry, which means the vinyl, fiber cement and engineered wood our siding guide compares. The flashing has to run at least 75 mm up the wall behind the sheathing paper, at least 75 mm out onto the roof, and step with a head lap of at least 75 mm. The Canadian Roofing Contractors Association states the same rule as a cutting size: step flashings are 75 mm longer than the exposed face of the shingle.
The catch is the sizing in generic instructions. IKO's guidance asks for step flashing at least 2 inches (50 mm) wider than the shingle exposure and calls 10 by 8 inches typical. A 2 inch margin is a 50 mm lap, and the Code asks for 75. On a CertainTeed Landmark, the shingle on our Stouffville tear-off, with its 5 5/8 inch exposure, an 8 inch piece laps 60 mm: 15 mm short on every course, all the way up the wall.
The drawing below lays four piece sizes along the same wall at that exposure, to scale, with the lap computed from the two numbers:
| Step piece | Length up the slope | Shingle exposure | Head lap | Against the minimum |
|---|---|---|---|---|
| 7 in piece (178 mm) | 178 mm | 143 mm | 35 mm | laps 35 mm, 40 mm short of 75 mm |
| 8 in piece (203 mm) | 203 mm | 143 mm | 60 mm | laps 60 mm, 15 mm short of 75 mm |
| 9 in piece (229 mm) | 229 mm | 143 mm | 86 mm | laps 86 mm, clears 75 mm |
| 10 in piece (254 mm) | 254 mm | 143 mm | 111 mm | laps 111 mm, clears 75 mm |
What to Ask About the Steps on Your Own Wall
Ask whoever flashes your roof what length they cut the steps to. The right answer is the shingle's exposure plus 75 mm, which on most laminated shingles means 9 inches or more. We fabricate flashing on site to fit the roof in front of us, and that is the point: the step length should follow the shingle, not the size that came in the box.
Two other details are worth a look while the shingles are off. IKO bends its step pieces 5 inches up the wall and 5 inches onto the deck, embeds each one in a 3 inch band of asphalt plastic cement, and nails it to the deck with two nails, never through the wall leg. Against brick, the steps then sit under counter flashing, as at a chimney.
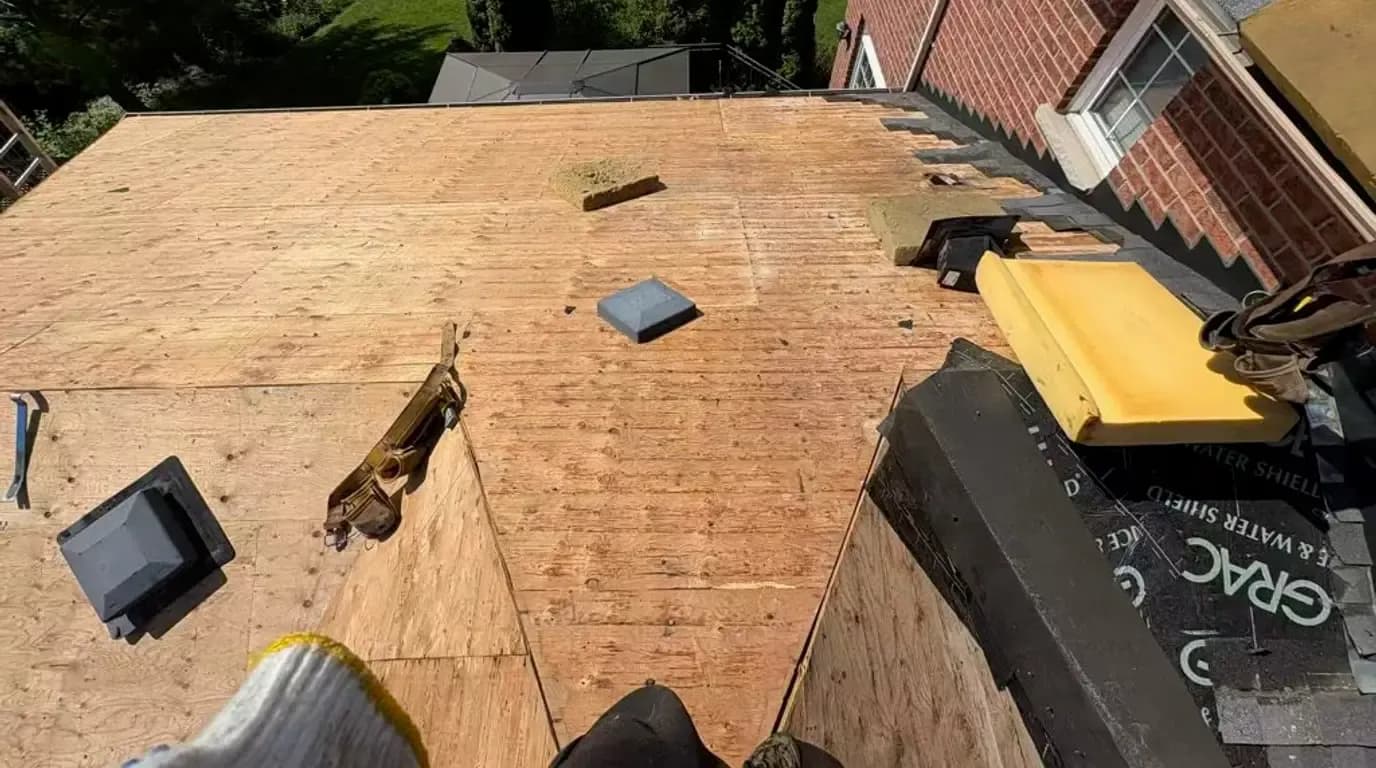
On our tear-off in Whitchurch-Stouffville, the old step flashing came off the brick wall with the shingles, down to bare deck. Any house with a dormer, a garage roof against the house or a change of roof height has walls like that one.
Stop 4: The Valley, the Busiest Water on the Roof
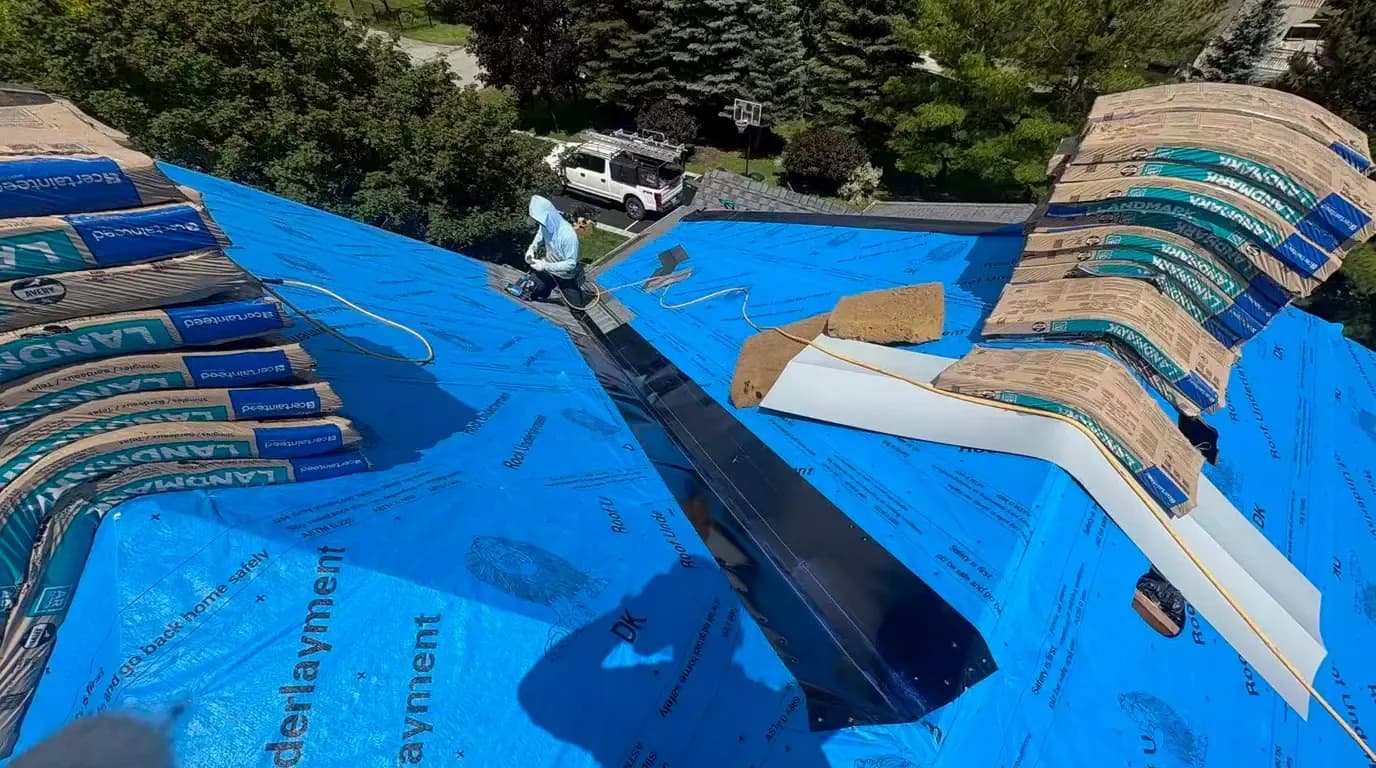
Two slopes meeting in a valley send the water of both down a single line, which makes it the heaviest flow on the roof. Article 9.26.4.3 requires every shingled valley to be flashed, over continuous sheathing, and sets the minimum for an open valley at one layer of sheet metal at least 600 mm wide, or two layers of roll roofing. Closed valleys, where the shingles run across the valley instead, are not allowed with rigid shingles on slopes under 1 in 1.2.
On the Stouffville roof we ran open metal valleys in black, so the valley's water sheds on the metal itself instead of relying on a shingle weave.
Valleys are also where leaves pile up and where ice and meltwater back up in an Ontario winter. A clogged valley costs about $150 to clear now and about $2,500 once it has backed water under the shingles through a winter, and the way ice builds there is covered in our guide to preventing ice damming.
Not sure which joint is letting water in?
We will trace the leak back to the joint and quote the fix, free and with no obligation.
Stop 5: The Kick-Out, the Piece the Code Never Names
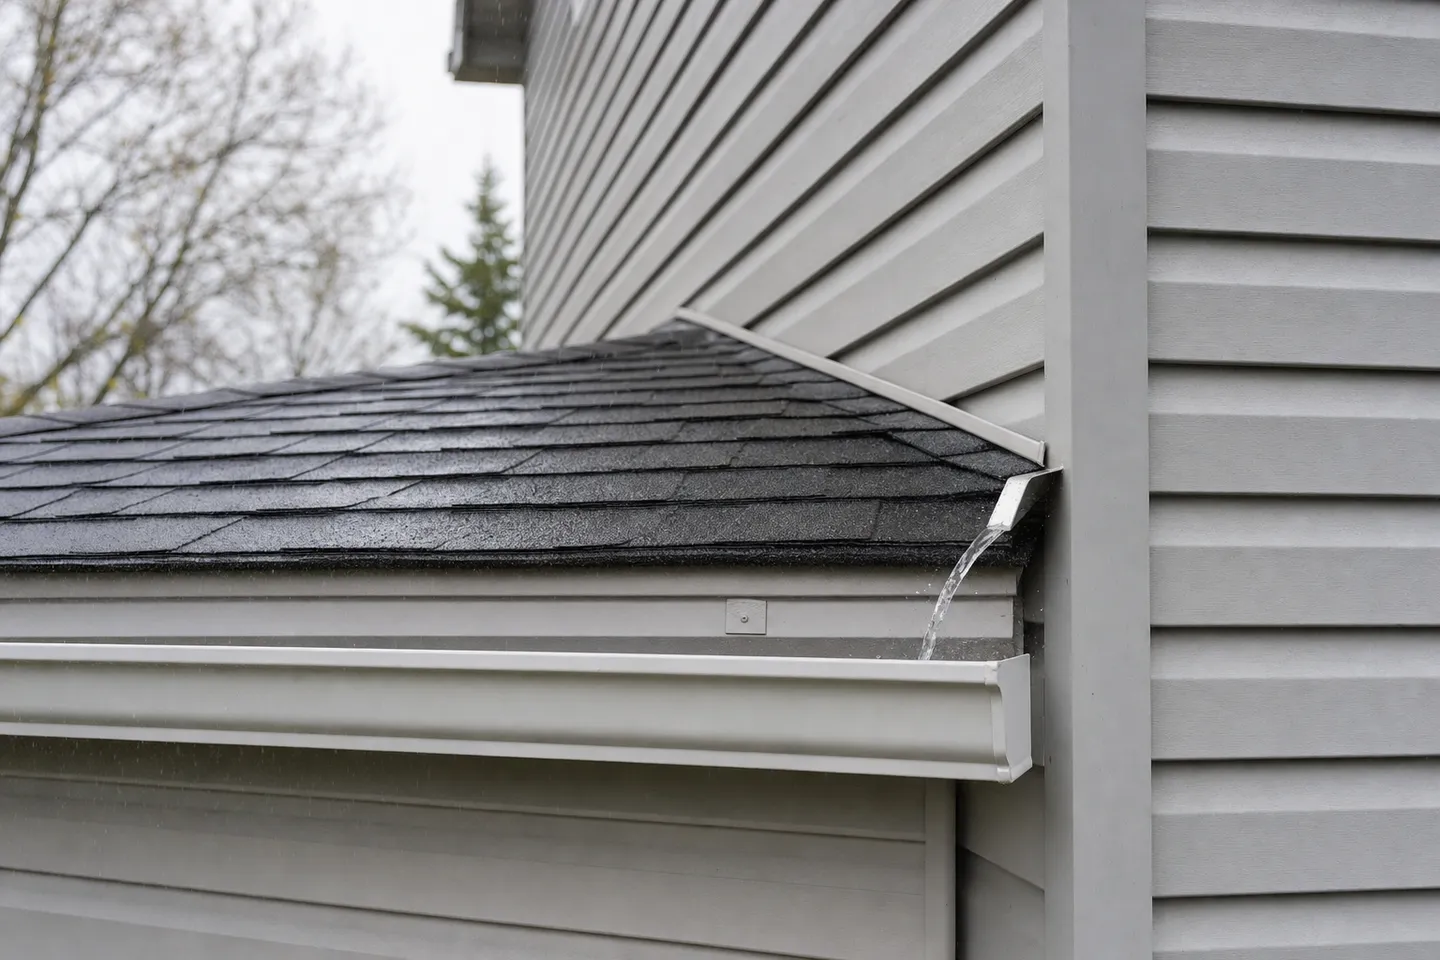
Where a lower roof runs into a taller wall, as a garage roof does against a two-storey, the last step flashing ends at the roof edge and the water it has carried has nowhere obvious to go. IKO describes the kick-out as the piece that bridges the gap between where the step flashing ends and the gutter begins, directing water away from the wall and into the gutter. Article 9.26.4 never names it, so nothing in the flashing rules forces it onto a roof.
Without one, that water runs down the face of the wall below the roof edge and can find its way behind the trim and the siding. It can wet the sheathing there long before anything shows on the outside face. If the siding below a roof-to-wall corner is stained, swollen or soft, check the wall behind it the way our siding repair guide describes before patching the face.
If your house has a roof edge that dies into a wall and there is no kick-out at the bottom of it, ask for one on the quote. It is a small bent piece of metal with a large job.
Stop 6: The Drip Edge, the Last Joint Before the Eavestrough
The raindrop's last joint is the roof edge itself. A drip edge holds the water off the fascia and drops it cleanly into the trough. Without one, water clings to the edge of the deck and wicks back onto the board behind the eavestrough.
The Code's flashing article does not size a drip edge. What it does require at the eave is eave protection under the shingles (Article 9.26.5.1): a membrane from the roof edge at least 900 mm up the slope, to a line at least 300 mm inside the inner face of the exterior wall. It exempts several cases, asphalt shingles installed to Subsection 9.26.8 among them. We put it on anyway, as we did at the eaves and through the valleys of the Stouffville roof with Grace Ice and Water Shield.
Dark, wet fascia behind a trough is usually this joint rather than a leaking trough. Our eavestrough repair guide works through that diagnosis fault by fault, and our guide to soffit and fascia covers what years of it do to the board.
What Does Roof Flashing Repair Cost in Ontario?
Roof flashing repair in Ontario runs about $150 to $600 for a minor reseal or a new vent boot, and $500 to $2,000 for most flashing installations. The expensive version is the one left too long: a failed chimney flashing can pass $3,000 once water gets into the wall.
| Flashing job | Typical cost (CAD) |
|---|---|
| Reseal a sound flashing or replace a cracked vent boot | $150 to $600 |
| Chimney flashing fixed before it leaks | About $400 |
| Most custom flashing installations | $500 to $2,000 |
| Flashing and ventilation package within a full reroof | $400 to $1,500 |
| Chimney flashing left through a winter of leaking | $3,000 or more |
These are the same figures Sherak publishes across this site. What moves a job within its range: the width of the chimney and whether it needs a saddle, whether the counter flashing has to be let into the mortar, the height and pitch of the roof, and how many shingle courses have to be lifted to reach the steps along a wall. On a full replacement, flashing is one line in the invoice rather than a separate job, as our roof replacement cost guide shows line by line.
Can Flashing Be Repaired, or Does It Need Replacing?
A flashing joint can be resealed when the metal is sound and correctly lapped, and only the sealant or a rubber boot has failed. When the step pieces are short, the counter flashing is caulked to the face of the brick instead of embedded, or the metal has corroded, resealing only buys time. That joint needs new flashing.
Replacing step flashing on a wall means lifting the shingle courses along that wall, because every step sits under a course. That is the real choice with a wall that keeps leaking: one proper reflash, or a reseal every spring.
Not every flashing job is on the main roof. On McCaffrey Road in Newmarket, the small hip roof over a bay window was taken back to bare sheathing and capped in formed grey metal, with the base of the bay wrapped to match. Where that little roof meets the brick above it, it is the same masonry joint the Code governs at a chimney, at a fraction of the size.
Six Questions to Put to Anyone Who Flashes Your Roof
Whoever you hire, these six questions separate a flashing job built to the Code from one built to a habit:
- How long are you cutting the step flashing? The answer should be the shingle exposure plus at least 75 mm.
- Will the counter flashing be let into the mortar, at least 25 mm, or caulked to the brick? Only the first meets Article 9.26.4.4.
- Is my chimney wider than 750 mm on the uphill side, and if so, where is the saddle?
- How wide is the valley metal? The Code minimum for an open valley is 600 mm.
- Where does a roof edge meet a wall on my house, and is there a kick-out there?
- Will any nails go through the wall leg of the step flashing? They should not.
At Sherak we are based in Gormley, and our crews work across York Region, Simcoe, the Kawarthas and the GTA. Every job carries our 10 year workmanship warranty and $5 million liability insurance, and the last 10 percent is due only once you are satisfied. If water is already coming in, our emergency roof repair crews answer 24/7. Otherwise, book a free roof flashing quote and we will check the route joint by joint.
Sherak Ltd, Head Office
12275 Woodbine Avenue, Gormley, ON L0H 1G0
Phone: +1 905 490 8800
Email: info@sherak.ca
Get every joint checked before winter
We check the vents, chimney, walls, valleys, kick-outs and drip edge, then put the findings and the price in writing.
Get a Free QuoteFrequently asked questions
What is the difference between step flashing and counter flashing?
Is caulking around a chimney enough to stop a leak?
Does every chimney need a cricket or saddle?
Can old flashing be reused on a new roof?
What metal is best for roof flashing in Ontario?
How do I know if my roof flashing is leaking?
Written by
Emad Alikhanpour
Roofing & Exterior Specialist
Emad has 15 years of hands-on experience across roofing and every exterior service Sherak offers, from shingle and metal roofs to siding, eavestroughs, soffit and fascia, and custom flashing.
15 years in the trade · Roofing and exterior services
View profileReader reviews
Loading reviews...